
Prepare for First Start
Your SMSEagle is designed so that you can set it up quickly and start using it right away. Follow the steps below to get started.
STEP 1: Install antennas
Antenna installation guidelines
Install antennas in a location with access to a cellular network radio signal.
Antennas must be installed such that it provides a separation distance of at least 23 cm (9 inches) from all persons and must not be co-located or operating in conjunction with antenna from any other transmitter.
Antennas must not be installed inside metal cases.
Screw antennas to the antenna connector on the back of the enclosure of SMSEagle device.
STEP 2: Insert SIM Card
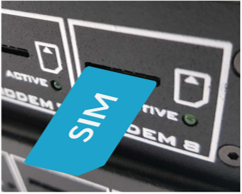
Please install SIM Card when the device is SWITCHED OFF. SIM Card slots is located on the front panel of the device. SIM metal contacts should face down when inserting SIM into slot.
STEP 3: Power the device
The device is powered with AC power cable delivered in the box. The device needs a power source of 100-240V AC.
STEP 4: Configure IP settings
SMSEagle default network configuration: DHCP client is on (IP address will be obtained automatically from your DHCP server)
A) Connect SMSEagle to your LAN and obtain IP address automatically
connect the device to your LAN using Ethernet cable and ETH1 port
SMSEagle will obtain IP address automatically from your DHCP
read assigned IP address on your DHCP server
B) Or set IP address for SMSEagle manually
connect a display using HDMI connector, connect a keyboard to USB port (note: cables are not provided)
login to the terminal window using root credentials (these were provided with your device)
edit configuration file with command:
nano /opt/smseagle/syscfgchange the following lines:
ETH1_HOST_IP= (set IP address for your device)
ETH1_GW_IP= (default gateway IP address)
ETH1_NET_MASK= (set subnet mask)
ETH1_START_DHCP=Y (set to ETH1_START_DHCP=N to disable DHCP client)
save and exit the file
shutdown the device
now connect SMSEagle to your LAN using Ethernet cable
Current IP address can be read from the display on front panel.
C) Log in to SMSEagle
Open an internet browser on your PC and go to the IP address assigned to your gateway
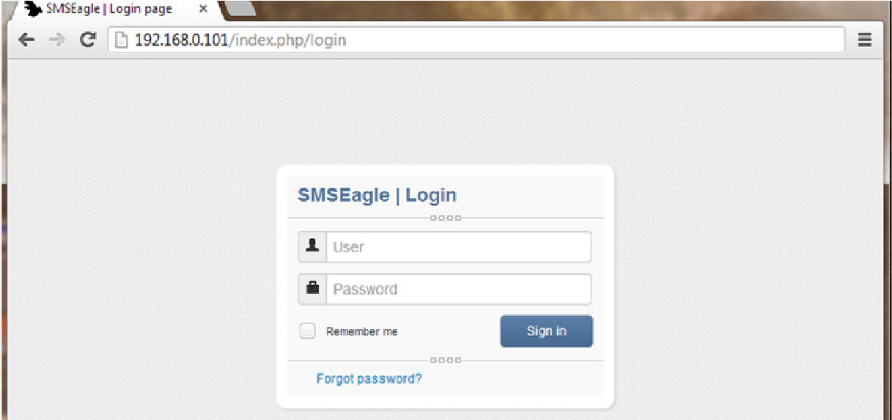
SMSEagle default user:
Username: admin
Password: password
Login to application with above username and password.
Important: Due to security reasons, after the first login, you will be prompted to change the default password.
Password complexity requirements: The password must be at least 8 characters long and include at least one lowercase letter, uppercase letter, number and special character.
STEP 5: Configuration Wizard
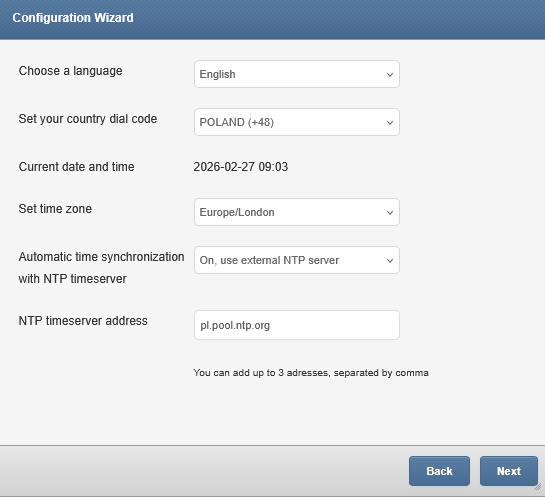
New SMSEagle devices are equipped with a built-in Configuration Wizard that guides the user through the initial setup process step by step. The wizard is launched automatically on first login and covers the most important configuration areas: SIM card setup, time zone, and user password change. The wizard can be skipped and accessed again later from the Settings menu.
STEP 6: Installing custom SSL certificate and HTTPS-only (OPTIONAL)
Installing your own SSL certificate
SMSEagle device comes with a self-signed SSL certificate. Follow the instructions in the chapter SSL Certificate and HTTPS Redirection if you want to install your own SSL certificate or a free Let’s Encrypt SSL certificate.
Using HTTPS only
By default, SMSEagle web GUI can be accessed via HTTP or HTTPS. For improved security we recommend using HTTPS. If you would like to redirect HTTP > HTTPS, follow instructions in the chapter SSL Certificate and HTTPS Redirection.
STEP 7: Reboot the device
Go to Settings > Maintenance Tab. Press Reboot button.