

Automation
This chapter covers the Automation section of the web interface, in the same order the rules appear there.
Email to SMS
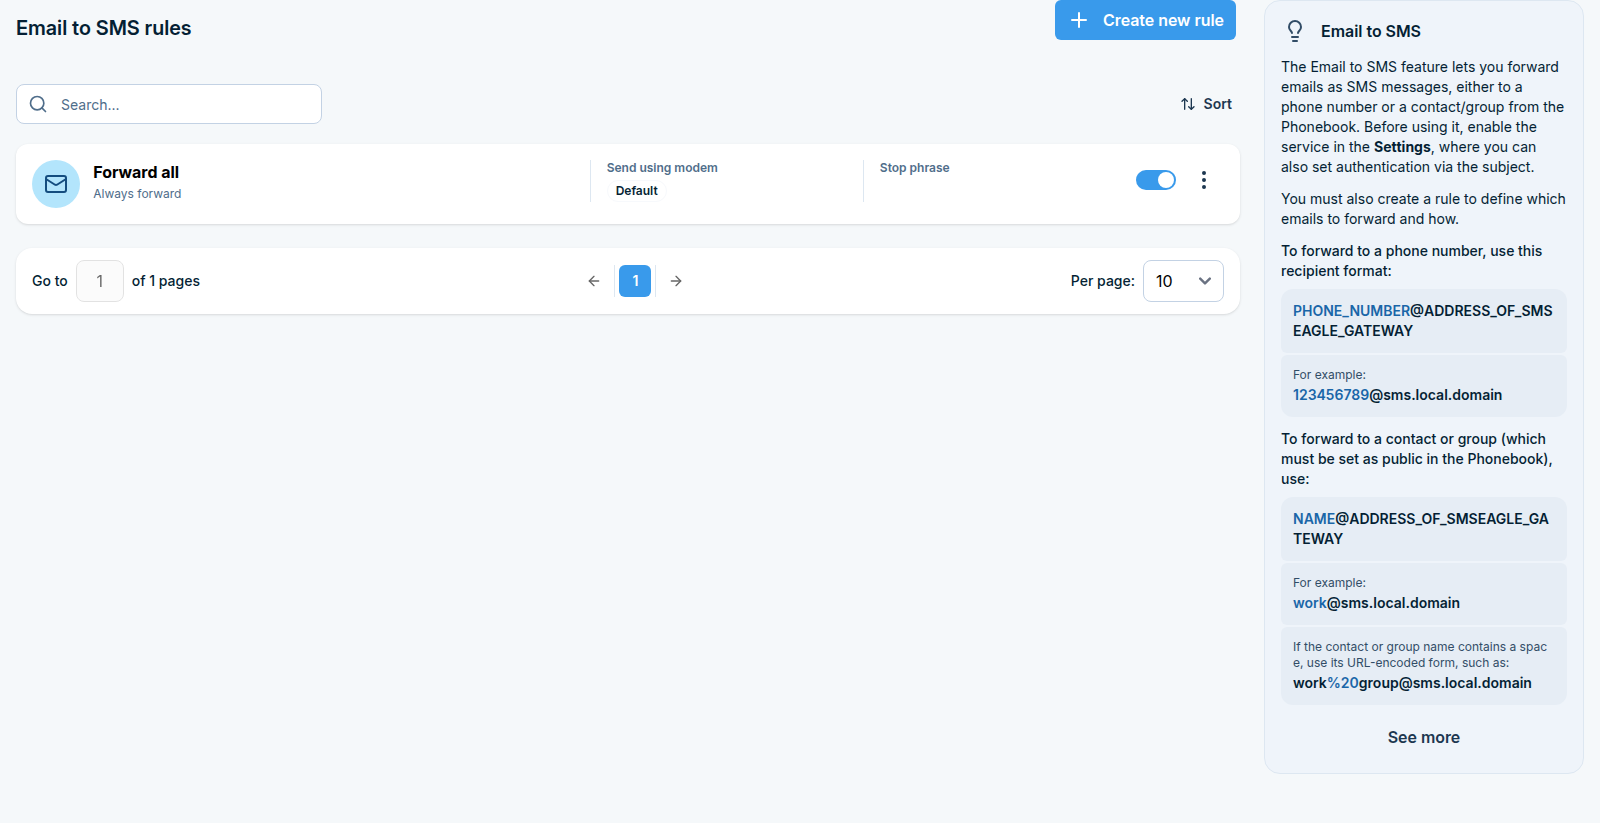
The Email to SMS feature lets you forward incoming emails as SMS messages, either to a phone number or to a contact/group from your Phonebook.
Where to find it
The feature is split across two places in the WebGUI:
Automation > Email > Email to SMS (
/automation/email-to-sms) is where you create and manage forwarding rules.Settings > Channels > Email > Email to SMS (
/settings/email/email-to-sms) is where you enable the service and configure how emails are converted to messages - see Email to SMS in Settings.
Step 1: Understand the recipient address format
Emails must be sent to a specially formatted address so SMSEagle knows where to deliver the message.
To forward to a phone number:
PHONE_NUMBER@ADDRESS_OF_SMSEAGLE_GATEWAY
For example: 999888777@gateway.smseagle.eu
To forward to a contact or group from the Phonebook (the contact or group must be set as public):
NAME@ADDRESS_OF_SMSEAGLE_GATEWAY
For example: work@gateway.smseagle.eu
If the contact or group name contains a space, use its URL-encoded form:
work%20group@gateway.smseagle.eu
Instead of the gateway IP address you can use a Fully Qualified Domain Name, set under
Settings > Channels > Email > Email to SMS > Advanced settings > FQDN hostname. If Use LDAP
contacts is enabled there, the same NAME@GATEWAY format also resolves contacts and groups
defined in LDAP / Active Directory.
By default the body of the email becomes the text of the SMS. This depends on the What to do with email subject setting in Settings: the subject can be ignored, prepended to the message text, used for authentication, or sent instead of the body.
Step 2: Create a new rule
Go to Automation > Email > Email to SMS and click Create new rule. A panel titled Add Email to SMS rule opens on the right.
Field |
Description |
|---|---|
Rule name * |
A name to identify the rule (required, max 100 characters) |
Forward for * |
Always send forwards every incoming email that matches the address format. Specified sender / message contains adds filtering conditions, see Step 3. |
Stop phrase |
Text starting from this phrase will be removed from the message (case sensitive) |
Priority |
Sending priority from 0 to 5. Messages with higher priority are processed first. |
Call after sending SMS |
No, Ring only, Yes - text to speech, or Yes - text to speech (advanced). The available options depend on the voice and TTS capabilities of your device. |
Voice model |
Voice used for the text-to-speech call. Shown only for devices supporting advanced TTS, and only after selecting Yes - text to speech (advanced). |
Force converting to UTF-8 |
Forces conversion of the message text to UTF-8 |
Remove conversation history |
Strips quoted history of the email conversation from the message text |
Click Save to create the rule, or Cancel to discard it.
Step 3: Add filtering conditions (optional)
If you select Specified sender / message contains under Forward for, three independent conditions become available, each with its own checkbox and text field:
When incoming email address contains filters by the sender’s email address
When incoming messages subject contains filters by the email subject line
When incoming message content contains filters by the email body text
The Case sensitive switch applies to all enabled conditions.
You may enable one, two, or all three conditions. The rule triggers only when all enabled conditions are met.
Step 4: Manage existing rules
Each rule appears as a card in the Email to SMS list, showing:
the rule name
the forwarding condition, for example Forward when incoming: email address contains: …, or Always forward when no condition is set
the modem used to send
the configured stop phrase
an on/off toggle to enable or disable the rule without deleting it
a ⋮ menu with Edit and Delete
Additional controls on the list:
Search filters rules by name.
Selecting rule checkboxes reveals bulk actions: Enable / Disable and Delete.
The pagination controls at the bottom let you jump to a page and change how many rules are shown per page.
The right-hand help panel explains the recipient address formats, with a See more button linking to the feature page on smseagle.eu.
Email to SMS Poller
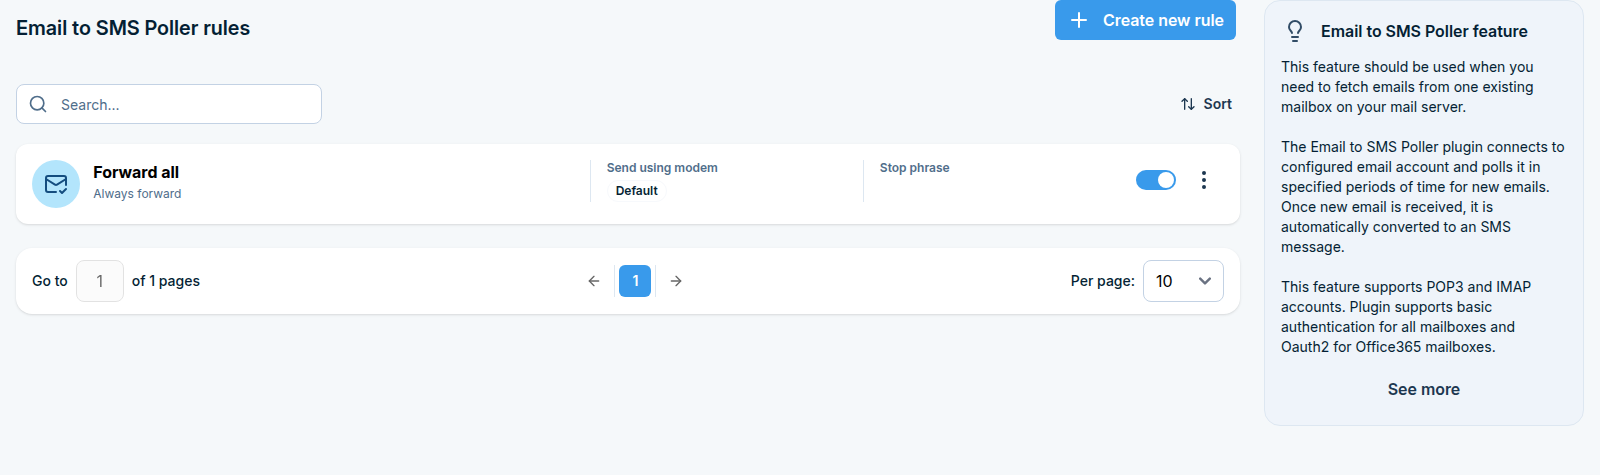
Email to SMS Poller periodically checks an external mailbox over POP3, IMAP, or IMAP with OAuth2 (Microsoft 365 / Outlook), and converts the emails it finds there into SMS messages according to the Email to SMS Poller rules. Unlike Email to SMS (which runs its own mail server and receives mail actively), the Poller reaches out to an existing mailbox you already have.
Where to find it
Automation > Email > Email to SMS Poller (/automation/email-to-sms-poller/) is where you
create and manage rules. Enabling the service and connecting the mailbox (POP3, IMAP, or IMAP +
OAuth2 for Microsoft 365) happens under
Email to SMS Poller in Settings.
Creating a rule
Click Create new rule. Rules here work the same way as Email to SMS rules - name the rule, choose whether it forwards every polled email or only ones matching sender/subject/ content conditions, and set the same per-rule options (modem, stop phrase, priority, call after sending).
SMS to Email
What this feature does
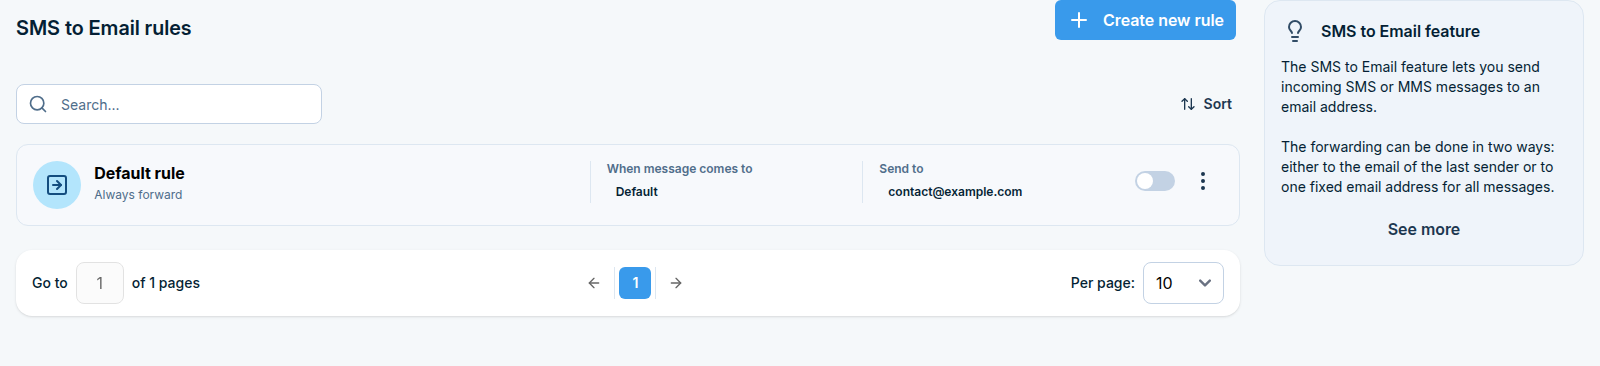
SMS to Email forwards incoming SMS and MMS messages to an email address, so you can read them in your mailbox instead of logging in to SMSEagle.
You create rules that decide which messages get forwarded and where they go. A rule can forward everything, or only messages from certain senders, or only messages containing a certain phrase.
Typical uses: forwarding replies from field staff to a shared support mailbox, or archiving alert confirmations into a ticketing system’s email inbox.
Before you start
SMSEagle needs a working mail server configuration to send the emails. Go to Settings > Channels > Email > SMTP Configuration and make sure it is filled in and tested - see SMTP Configuration. Without it, rules will match but no email will arrive.
If you want to forward based on sender contacts or groups, those contacts and groups must be marked as Public in the Phonebook.
Step 1: Open the SMS to Email page
In the sidebar, go to Automation > Email > SMS to Email.
Step 2: Create a rule
Click Create new rule in the top right corner. A side panel opens.
Name the rule
In Rule name, type something descriptive, for example Forward all to support. Maximum 100
characters.
Decide which messages to forward
Choose Forward for:
Option |
What it means |
|---|---|
Always forward |
Every incoming SMS and MMS is forwarded. |
Specified sender / message |
Only messages matching the conditions you set below are forwarded. |
If you chose Specified sender / message, two conditions become available. You can use one or both. When you use both, a message must satisfy both to be forwarded.
When incoming SMS comes from Tick this and select the contacts or groups whose messages should be forwarded. Start typing to search. Only public contacts and groups can be selected here.
When incoming SMS text contains
Tick this and type the phrase to look for, for example URGENT. The phrase can appear anywhere in
the message text. Tick Case sensitive if urgent and URGENT should be treated as different.
Choose the destination email address
Choose Type of email forwarding:
Option |
What it means |
|---|---|
To fixed email address |
Every matching message goes to the one address you enter in Forward to email address. |
To email of last sending user |
The message goes back to the email address of the person who last sent an SMS to that phone number through SMSEagle. This closes the loop on an email-to-SMS conversation. Enter a Default email address as a fallback, used when there is no last sender on record. |
Set the email subject
Email subject controls the subject line of the forwarded email. You can use placeholders, which are replaced with real values when the email is sent:
Placeholder |
Replaced with |
|---|---|
|
The phone number the SMS came from |
|
The first |
|
The first |
Example: SMS from {SENDER}: {WORDS,5} produces a subject like
SMS from +48111222333: Server room temperature alarm triggered. Maximum 150 characters.
Click Save. The rule starts working immediately on newly received messages.
SMS Forward
What this feature does
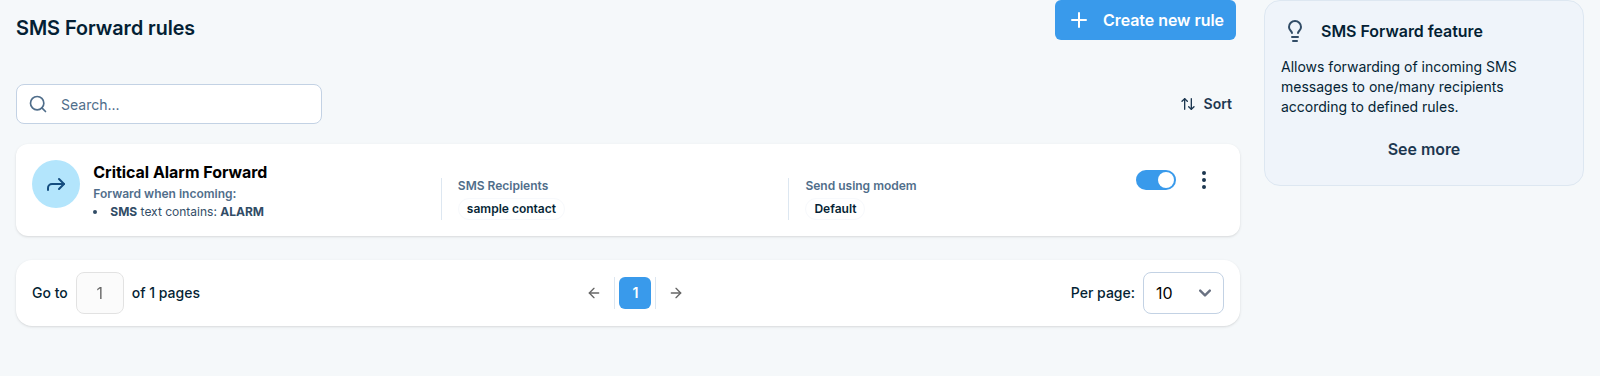
SMS Forward passes incoming SMS messages on to other people. When a message arrives, SMSEagle sends it out again to the recipients you choose.
You can forward the message exactly as it came in, or replace it with your own text. You can also add a voice call on top of the forwarded SMS, so an alert cannot be slept through.
Typical uses: sending alarm messages from a machine to the whole on-call team, passing messages from a shared number to the person currently on duty, or turning a short machine code into a readable sentence for the team.
Before you start
The contacts and groups you forward to must exist in the Phonebook. Contacts and groups used as forwarding recipients or as sender conditions have to be marked as Public.
Decide whether the recipients need the original wording or a rewritten message.
Step 1: Open the SMS Forward page
In the sidebar, go to Automation > SMS > SMS Forward.
Step 2: Create a rule
Click Create new rule in the top right corner. A side panel opens.
Name the rule and set its priority
Rule name
Something descriptive, for example Alarms to on-call team. Maximum 100 characters.
Priority A number from 0 to 9. Messages produced by a higher-priority rule are queued for sending earlier than messages from a lower-priority rule. Leave it at the default unless you have urgent rules that must overtake bulk ones.
Decide which messages to forward
Choose Forward for:
Option |
What it means |
|---|---|
All incoming messages |
Every incoming SMS is forwarded. |
Specified sender / message |
Only messages matching the conditions you set below are forwarded. |
If you chose Specified sender / message, two conditions become available. You can use one or both. When you use both, a message must satisfy both to be forwarded.
When incoming SMS comes from Tick this and select the sender contacts or groups in Sender contacts. Only public contacts and groups can be selected here.
When incoming SMS text contains
Tick this and type the phrase in Text fragment, for example ALARM. The phrase can appear
anywhere in the message. Tick Case sensitive if alarm and ALARM should be treated as
different.
Choose what the forwarded message says
Use Message content:
Option A: Original message
The recipients get the incoming text unchanged. One extra choice appears, Message header:
Option |
Result |
|---|---|
Don’t include |
Only the original text is forwarded. |
Include sender |
The phone number of the original sender is added to the forwarded message, so recipients know where it came from. |
Option B: Custom text
The recipients get your own text instead of the original. Type it in Custom message (maximum 500 characters). You can pull pieces of the original message in with placeholders:
Placeholder |
Replaced with |
|---|---|
|
The phone number the SMS came from |
|
The full text of the original message |
Example: Alarm from {SENDER}. Details: {MESSAGE} sends a readable sentence built around the raw
machine text.
Choose the recipients
In Forward to, select the contacts or groups that should receive the message. Start typing to search. This field is required, a rule cannot be saved without at least one recipient.
Optionally add a phone call
Call after sending SMS makes the device also place a voice call to the same recipients. The available options depend on your device model:
Option |
What happens |
|---|---|
No |
No call is made. This is the default. |
Ring only |
The device rings the recipient and hangs up. No audio is played. |
Yes - text to speech |
The device calls and reads out the message text. |
Yes - text to speech (advanced) |
Same as above, using a selectable, more natural voice. Choose the voice in the Voice model field that appears. |
If your device does not support voice calls, only No is available.
Click Save. The rule starts working immediately on newly received messages.
How forwarding works
The text condition is a contains match, not an exact match. A rule looking for
ALARMforwards a message sayingROOM 4 ALARM triggered.If several rules match the same incoming message, each of them forwards separately, so recipients can receive more than one SMS. Keep the conditions distinct to avoid duplicates.
Rules apply only to messages arriving after the rule was created and enabled. They do not process messages already in the inbox.
Recipients can still be skipped for their own reasons: Vacation mode on the contact, a shift that is currently outside its hours (see Shifts), or the number being on the deny list.
Avoid forwarding loops. Do not forward messages to a number that itself forwards back to your device. Two devices pointing at each other will keep sending messages back and forth.
Autoreplies
What this feature does
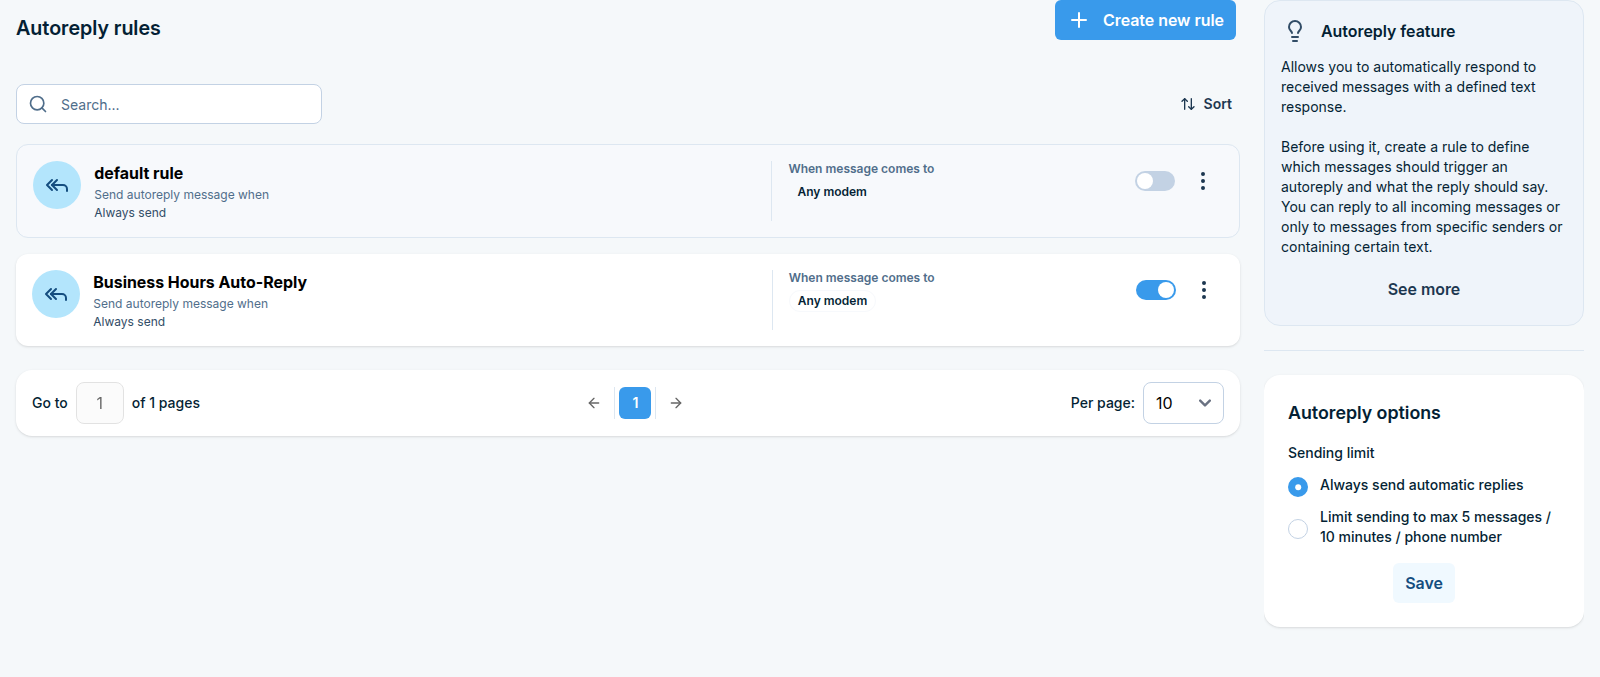
Autoreplies sends an automatic text answer to incoming SMS messages.
You create rules that decide which incoming messages get an answer and what the answer says. A rule can reply to everything, or only to messages from certain senders, or only to messages containing a certain phrase.
Typical uses: confirming that an order request was received, telling people that the number is unattended at night, or answering a keyword with fixed information such as opening hours.
Before you start
The device must be able to send SMS. Check that at least one modem is connected and registered on the network.
If you want to reply only to specific senders, those contacts and groups must be marked as Public in the Phonebook.
Step 1: Open the Autoreplies page
In the sidebar, go to Automation > SMS > Autoreplies.
On the right side of the page there is an Autoreply options box. It holds one setting that applies to all rules, described in Step 3.
Step 2: Create a rule
Click Create new rule in the top right corner. A side panel opens.
Name the rule
In Rule name, type something descriptive, for example Out of hours reply. Maximum 100
characters.
Decide which messages to answer
Choose Send autoreply for:
Option |
What it means |
|---|---|
All incoming messages |
Every incoming SMS gets the reply. |
Specified sender / message |
Only messages matching the conditions you set below get a reply. |
If you chose Specified sender / message, two conditions become available. You can use one or both. When you use both, a message must satisfy both to get a reply.
When incoming SMS comes from Tick this and select the contacts or groups that should get a reply. Start typing to search. Only public contacts and groups can be selected here.
When incoming SMS text contains
Tick this and type the phrase to look for, for example PRICE. The phrase can appear anywhere in
the message text. Tick Case sensitive if price and PRICE should be treated as different.
Write the reply
Autoreply message The text that is sent back. Maximum 2000 characters. The same text goes to everyone who triggers this rule, so keep it general.
Send as Unicode Tick this if the reply contains characters outside the standard GSM alphabet, such as Polish, German or Cyrillic letters. Unicode messages fit fewer characters per SMS part.
Click Save. The rule starts working immediately on newly received messages.
Step 3: Set the sending limit
The Autoreply options box on the right of the page controls how often the device is willing to auto-answer the same phone number:
Option |
Result |
|---|---|
Always send automatic replies |
Every matching message gets a reply, no matter how many arrive. |
Limit sending to max 5 messages / 10 minutes / phone number |
At most 5 automatic replies go to the same phone number within 10 minutes. Further messages from that number are not answered until the window passes. |
Pick the option you want and click Save.
It’s highly recommended to use the limit. Without it, two devices that both auto-reply can end up answering each other in a loop, which burns through SMS credits quickly. The limit is the safeguard against that.
This setting is global. It applies to every autoreply rule on the device.
How matching works
The text condition is a contains match, not an exact match. A rule looking for
PRICEanswers a message sayingwhat is the PRICE of item 5.If several rules match the same incoming message, each of them sends its own reply, so the sender can receive more than one SMS. Keep the conditions distinct if you only want one answer.
Rules apply only to messages arriving after the rule was created and enabled. They do not process messages already in the inbox.
Periodic SMS
What this feature does
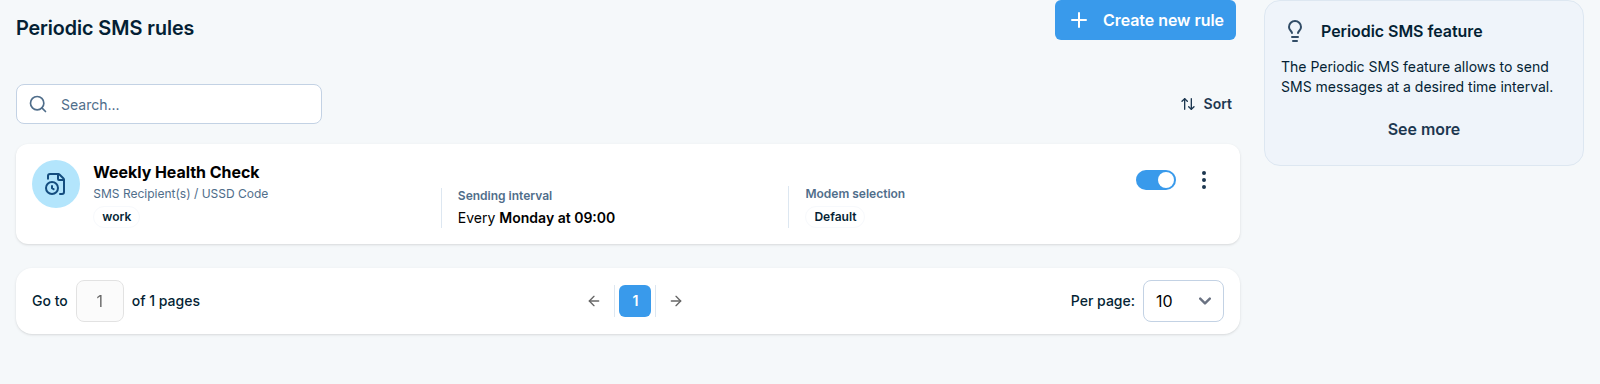
Periodic SMS sends a message automatically on a repeating schedule, without anyone having to click Send. You create a rule once, and SMSEagle keeps sending it every hour, day, week, month or year.
You can schedule two things:
an SMS to phone numbers or to a Phonebook group, optionally followed by a phone call,
a USSD code sent to your mobile operator (for example to check the prepaid balance of the SIM card).
Typical uses: a daily “system alive” message, a weekly reminder to a duty team, a monthly balance check on a prepaid SIM.
Before you start
If you want to send to a group, the group must exist in Phonebook > Groups and be marked as Public. Private groups cannot be selected here.
Make sure the device clock and time zone are correct, because the schedule follows device time. Check this in Settings > Date/Time.
Step 1: Open the Periodic SMS page
In the sidebar, go to Automation > SMS > Periodic SMS. You will see the list of rules you already have.
Step 2: Create a rule
Click Create new rule in the top right corner. A side panel opens.
Name the rule
In Rule name, type something you will recognise later, for example Daily heartbeat or
Monthly SIM balance. Maximum 100 characters.
Set the schedule
Choose a Sending interval. The fields below the selector change depending on what you pick:
Interval |
What you set |
Example |
|---|---|---|
Hourly |
At minute (in 5-minute steps) |
|
Daily |
At time |
|
Weekly |
At week day and At time |
|
Monthly |
At day of month and At time |
|
Annually |
At month - day (format |
|
Days that do not exist: if you schedule something for day 31 of every month, it will not be sent in months that are shorter. Use day 28 or earlier if the message must go out every month.
Choose what to send
Use the Message type switch at the top of this section:
Option A: SMS
Type the text in SMS Text (maximum 2000 characters).
Tick Send as Unicode if the text contains characters outside the standard GSM alphabet, such as Polish, German or Cyrillic letters. Note that Unicode messages fit fewer characters per SMS part.
Under Send to, choose where the message goes:
Public groups - start typing a group name and pick it from the list. You can add several groups.
Input manually - type the phone numbers. Separate multiple numbers with commas, for example
+48111222333,+48444555666.
You must fill in one of the two, otherwise the rule cannot be saved.
Option B: USSD Code
Type the code in USSD code, for example *100#. The reply from the operator arrives as an
incoming message in your inbox.
USSD codes are sent through the modem to your mobile operator. The available codes depend on the operator, not on SMSEagle.
Optionally add a phone call
Call after sending SMS makes the device also place a voice call to the same recipients, which is useful for alerts that must not be missed. The available options depend on your device model:
Option |
What happens |
|---|---|
No |
No call is made. This is the default. |
Ring only |
The device rings the recipient and hangs up. No audio is played. |
Yes - text to speech |
The device calls and reads out the message text. |
Yes - text to speech (advanced) |
Same as above, using a selectable, more natural voice. Choose the voice in the Voice model field that appears. |
If your device does not support voice calls, only No is available.
Click Save. The rule appears in the list and starts running at its next scheduled time.
Subscriptions
What this feature does
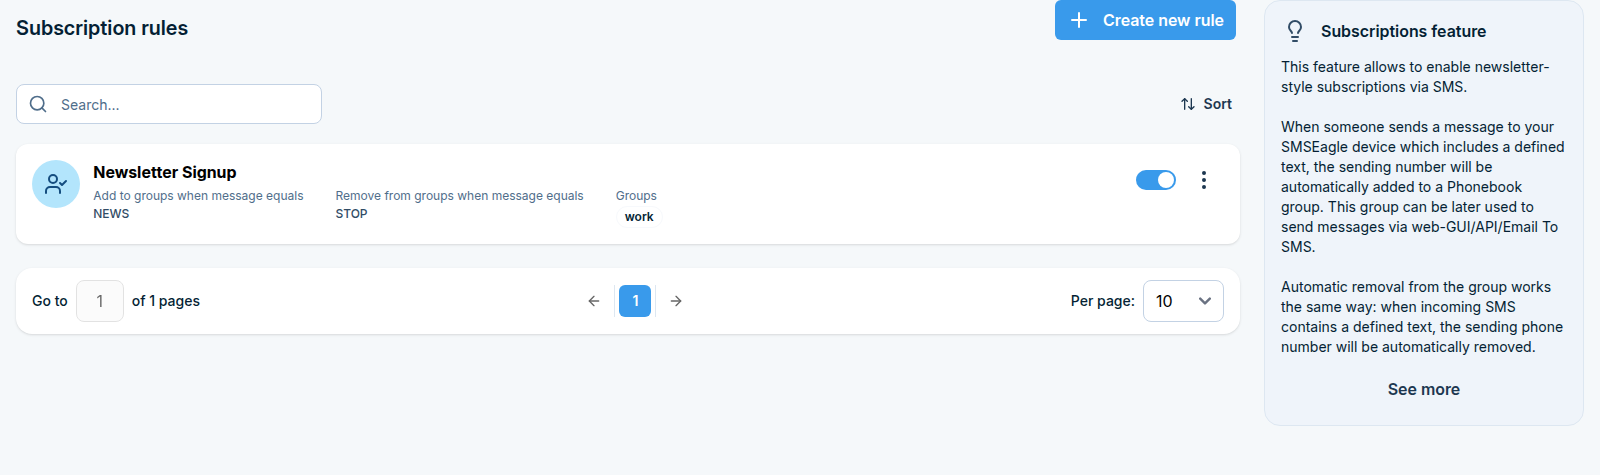
Subscriptions let people join and leave a Phonebook group by sending an SMS, the same way a newsletter opt-in works.
You define two keywords: one that adds the sender to a group, and one that removes them. When somebody texts your SMSEagle number with one of those keywords, their phone number is added to or removed from the group automatically. You can then send messages to that group from Compose, the API or Email to SMS.
Typical uses: a public alert list that residents can opt into, or a shift notification list that staff can join themselves without an administrator.
Before you start
Create the group that people will subscribe to:
Go to Phonebook > Groups.
Click Add new, give the group a name and tick Set as Public Group.
Click Save.
Only public groups can be used in a subscription rule.
You also need to tell your users which number to text and which keyword to send. SMSEagle does not advertise this automatically.
Step 1: Open the Subscriptions page
In the sidebar, go to Automation > SMS > Subscriptions.
Step 2: Create a rule
Click Create new rule in the top right corner. A side panel opens. Fill in the fields:
Rule name
Something you will recognise, for example Flood alerts opt-in. Maximum 100 characters.
Groups Start typing and select one or more groups. Subscribers are added to, or removed from, all the groups listed here. Only public groups can be selected.
Add phone number to groups, when incoming message equals
The keyword that subscribes somebody, for example JOIN or START ALERTS. The keyword must be unique to the subscription rule.
Remove phone number from groups, when incoming message equals
The keyword that unsubscribes somebody, for example STOP or LEAVE.
Case sensitive
Leave this unticked so that join, Join and JOIN all work. Tick it only if you need the
keyword to match exactly as typed.
Click Save.
How matching works
This is the most important detail to communicate to your users:
The whole incoming message must be exactly the keyword. Nothing else may be in the message.
Keyword is |
Result |
|---|---|
User texts |
Subscribed |
User texts |
Subscribed (unless Case sensitive is ticked) |
User texts |
Nothing happens |
User texts |
Nothing happens |
Because of this, keep keywords short and easy to type, and tell your users to send only the keyword.
What happens when somebody subscribes
If the sender’s phone number is already in the Phonebook, that existing contact is added to the group.
If the number is not in the Phonebook, SMSEagle creates a new contact for it automatically. The contact is named after the rule plus the phone number, for example
Flood alerts opt-in +48111222333, and it is created as a private contact.
When somebody unsubscribes, they are removed from the group, but the contact itself is kept in the Phonebook.
You can review who has joined at any time: go to Phonebook > Groups, find the group and open Manage contacts.
Allow / Deny List
What this feature does
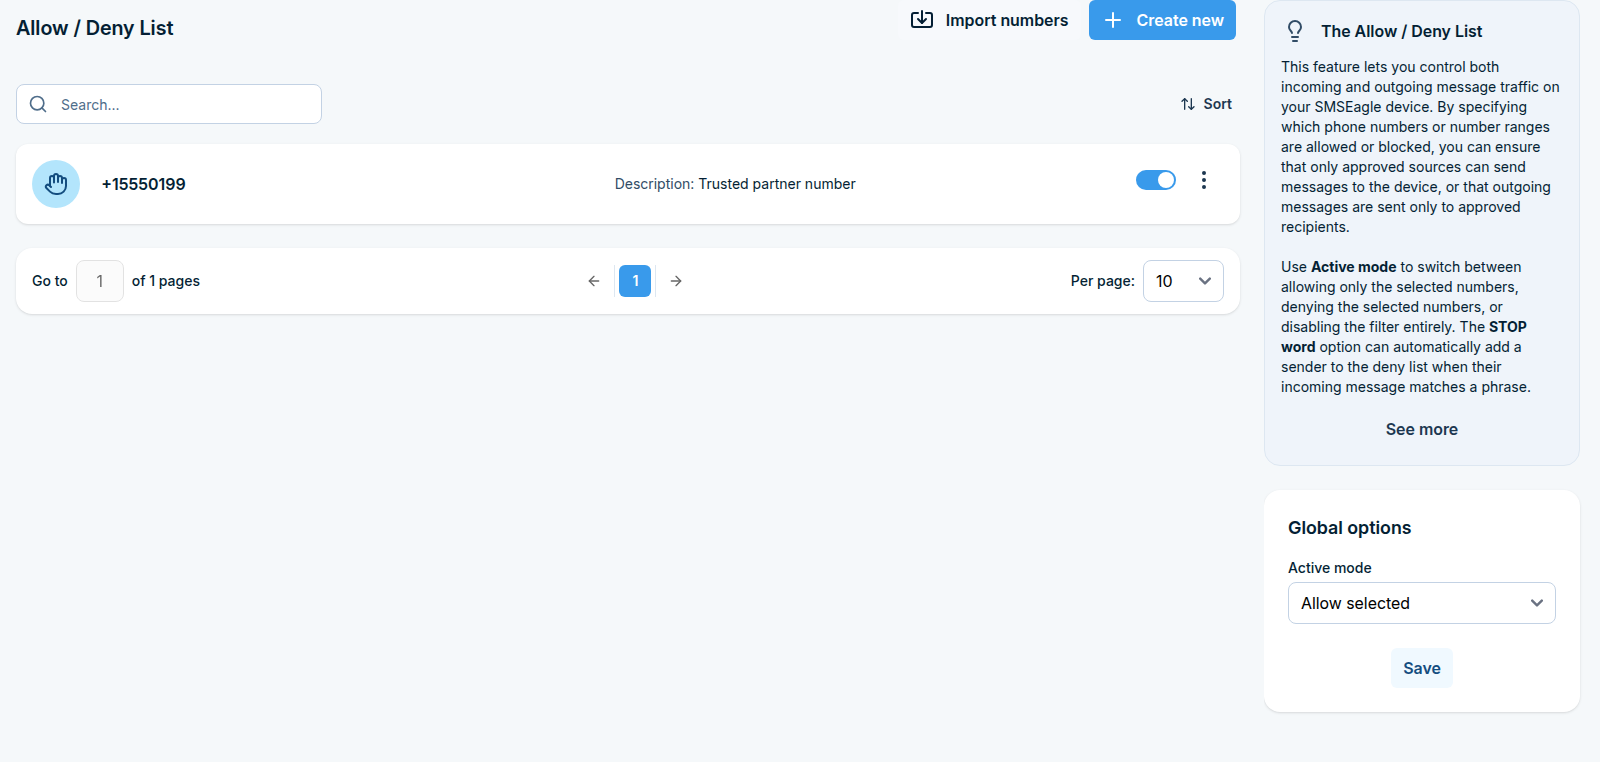
The Allow / Deny List filters SMS traffic on your device by phone number.
You keep a list of numbers and choose how the device treats it:
Active mode |
What happens |
|---|---|
Allow selected |
Only the numbers on the list are accepted. Everything else is ignored. |
Deny selected |
The numbers on the list are ignored. Everything else is accepted. |
Disabled |
No filtering at all. The list is kept but not used. |
Typical uses: blocking a number that keeps spamming the device (Deny), or locking a gateway down so that only your own alarm systems can talk to it (Allow).
There is also a STOP word option, which adds a sender to the list automatically when their
message matches a phrase you define. That is what makes an opt-out keyword such as STOP work.
Before you start
Decide which way round you want to work. Allow selected and Deny selected use two separate lists, so the rules you add in one mode are not visible in the other. Switching the mode switches the whole list, it does not invert it.
Step 1: Open the Allow / Deny List page
In the sidebar, go to Automation > General > Allow / Deny List.
On the right side there is a Global options box holding the Active mode setting and the STOP word configuration. Both are described below.
Step 2: Choose the active mode
In the Global options box, set Active mode to Allow selected, Deny selected or Disabled, then click Save. The page reloads showing the list that belongs to the mode you picked.
While the mode is Disabled, the page shows a “Filtering is disabled” notice instead of the list, and rules cannot be added or edited. Switch to Allow selected or Deny selected to manage them again.
Step 3: Add a number
Click Create new in the top right corner. A side panel opens.
Phone number
The number this rule applies to. Maximum 15 characters. Only digits, + and * are allowed, and
the entry must contain at least one digit.
You can match a whole range of numbers by using * as a wildcard, which stands for any
characters:
Pattern |
Matches |
|---|---|
|
Exactly that number |
|
Any number ending with it |
|
Any number starting with it |
|
Any number containing it |
For example, 48512* covers every number starting with 48512, and *12345678 matches the same
subscriber no matter which country prefix format arrives.
Description
A short note explaining why the number is on the list, for example Spam or Alarm panel, HQ.
Required, maximum 255 characters.
Click Save.
Step 4: Import a list from CSV
If you already have the numbers in a spreadsheet, click Import rules in the top right corner instead of adding them one by one.
Prepare a UTF-8 encoded CSV file with exactly two columns, headed Number and Reason.
Click Import rules, drop the file into the upload area or click it to browse.
Click Import.
The numbers are added to the list that is currently active.
Step 5: Configure the STOP word (optional)
The STOP word adds senders to the list automatically, so people can opt out by texting a keyword.
In the Global options box, click Edit config next to STOP word. A side panel opens. Choose Auto add number to list when:
Option |
What it means |
|---|---|
Never |
The STOP word is off. Numbers are only added by hand or by import. |
Incoming message equals to… |
The whole message must be exactly the phrase you type. |
Incoming message contains to… |
The phrase may appear anywhere in the message. |
If you pick one of the two matching options, two more fields appear:
The phrase itself, maximum 160 characters, for example
STOP.Autoreply message, maximum 160 characters. This text is sent back to the number after it has been added to the list. Leave it empty if you do not want to confirm the opt-out.
Click Save. The summary in the Global options box now shows the active condition and the autoreply text.
Use “equals” rather than “contains” for opt-out keywords. With contains, an ordinary message such as
please stop sending the night reportswould also remove the sender.
How filtering works
The filter is applied to messages arriving after the rule was created and enabled. It does not reprocess messages already in the inbox.
A disabled rule is ignored completely, whichever mode is active.
Allow selected and Deny selected keep separate lists. If you switch the mode and the page looks empty, you are looking at the other list, nothing has been deleted.
The STOP word setting is global: it applies to the list that is currently active.
Workflows
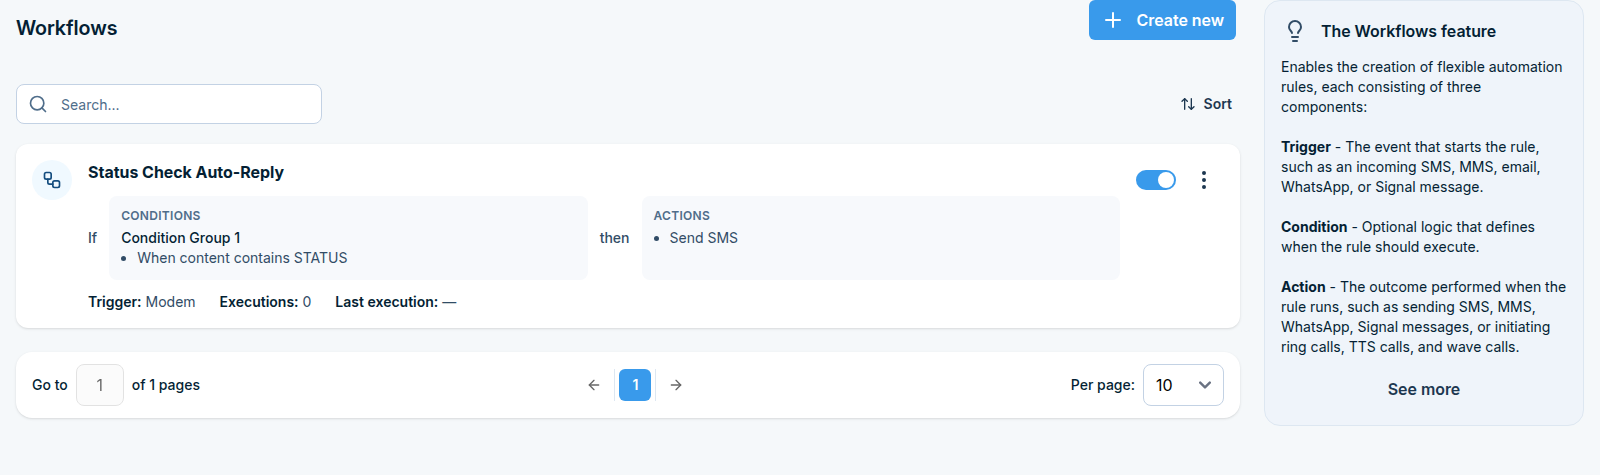
Workflows let you build flexible automation rules without needing a separate integration for every combination of trigger and action. Each workflow consists of three parts:
Trigger - the event that starts the rule: an incoming SMS, MMS, email, WhatsApp, or Signal message (or a modem delivery/sent/sending-error event).
Condition - optional logic that decides whether the rule should run for a given event.
Action - what happens when the rule runs: sending an SMS, MMS, WhatsApp, or Signal message, or initiating a ring call, TTS call, or wave call.
Where to find it
Automation > General > Workflows (/automation/workflows/).
Step 1: Create a workflow and pick a trigger
Click Create new, give the workflow a Name, and choose a Trigger: Modem, Email, Signal, WhatsApp, Modem (delivered), Modem (sent), or Modem (sending error).
Step 2: Add condition groups (optional)
Under Condition groups, click Add group to add one or more conditions the incoming event must match before the workflow runs. Leave this empty if the workflow should run for every event matching the trigger.
Step 3: Add actions
Under Actions, click Add action to define what the workflow does when it runs - for example sending a reply, forwarding the message to another channel, or placing a call.
Click Save workflow to activate it.
Webhooks
What this feature does
A webhook makes SMSEagle call your system. Whenever something happens on the device (a message arrives, a message is sent, a delivery report comes back, a call comes in), the device sends an HTTP(S) request to a URL you choose, carrying the details as parameters.
That is how you push SMS traffic into a ticketing system, a CRM, a chat bot or your own application without polling the API.
Two integrations get dedicated support:
Method |
What it is for |
|---|---|
POST (3CX) |
Pushing messages into a 3CX phone system. |
POST (Zabbix) |
Acknowledging Zabbix events by SMS, so an engineer can reply |
Before you start
You need the URL that will receive the requests, reachable from the device. Local and private addresses are rejected.
Your endpoint should answer with HTTP 200 OK, or with whichever status codes you configure in the rule.
For Zabbix you need either an API token (Zabbix 6.4 and newer) or a username and password.
Step 1: Open the Webhooks page
In the sidebar, go to Automation > General > Webhooks.
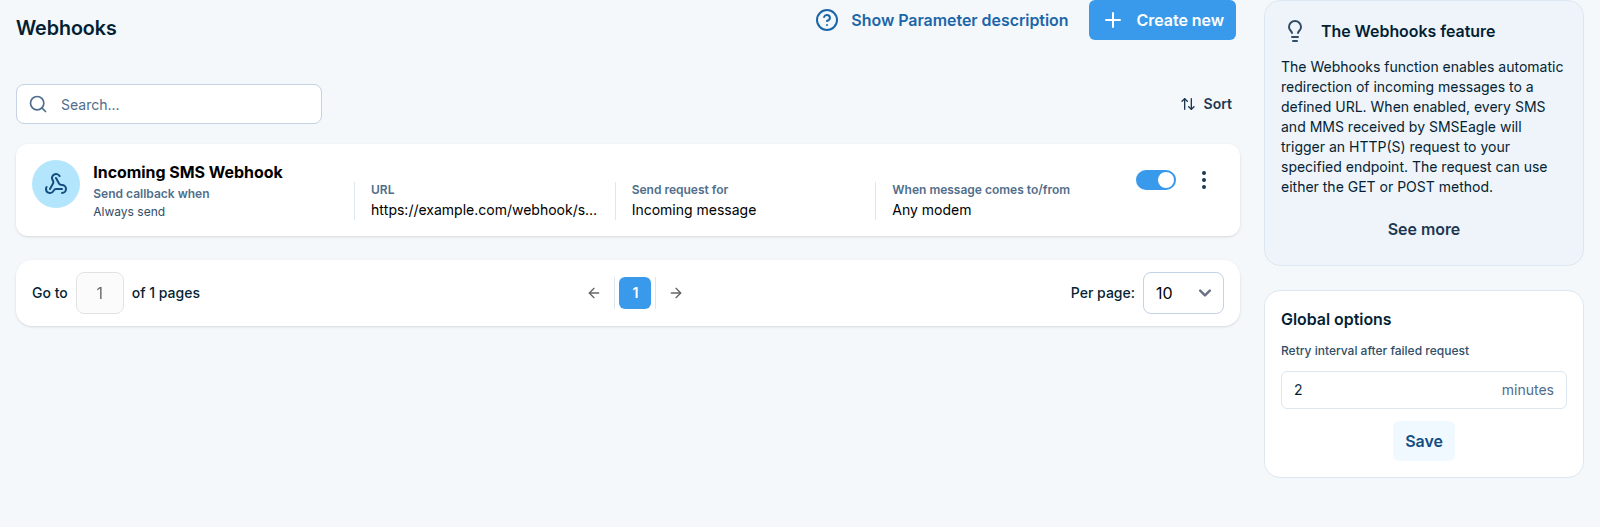
Each rule shows its URL and what it fires for. Every rule has a switch to enable or disable it, an Edit action and a Delete action.
The Global options box on the right holds one setting that applies to all rules, described in Step 6.
Step 2: Create a rule
Click Create new in the top right corner. The webhook form opens as a full page with three sections.
Step 3: Basic configuration
Field |
What to enter |
|---|---|
Rule name |
A descriptive name, maximum 100 characters. |
URL |
The address to call, maximum 300 characters, for example |
URL method |
GET, POST, POST (3CX) or POST (Zabbix). |
Content type |
Only for plain POST: FormData or JSON. |
To (3CX) |
Only for POST (3CX): the destination in your 3CX system. |
Click Test connection next to the URL to send a sample request straight away. The result appears below the field and tells you the HTTP status that came back, so you can confirm the endpoint works before saving.
For GET and POST, an example of the request string is shown under the fields, so you can see exactly what your endpoint will receive.
What the request contains
The request your endpoint receives carries the event details as parameters. Some are sent for every event, others only for messages or only for calls.
Always sent
Parameter |
What it carries |
|---|---|
|
Sender number. |
|
When SMSEagle received or sent the message, as |
|
The SMSEagle message id. |
|
The modem the incoming message was received on, or the one the message was sent from. |
|
The API key of your service, if you set one in the Security settings. Optional. |
Sent for SMS and MMS only
Parameter |
What it carries |
|---|---|
|
Content of the SMS message. |
|
Binary content of the SMS message. |
|
Message status. |
|
Value of the OID identifier assigned to an outgoing message with a matching phone number. Optional. |
|
MMS attachments, for example |
Sent for incoming voice calls only
Parameter |
What it carries |
|---|---|
|
Status of the incoming call: |
A rule fires for one event type, so a request only ever carries the parameters of that type. A
rule with the Incoming call trigger, for instance, never sends text or attachments.
Whatever the method, SMSEagle expects your endpoint to answer with 200 [OK], unless you widen that with Expected HTTP Status Code(s) in the Security settings.
The Show Parameter description link on the rules page opens this same list inside the application, together with a sample GET request:
?sender=48601123123×tamp=20140531092257&msgid=431&modemno=1&text=This+is+an+incoming+message
Customising parameter names
By default the request uses the SMSEagle parameter names listed above. If your endpoint expects different ones, tick Customize parameter names and type your own name next to each parameter you want renamed. Every parameter in the three tables can be renamed; the ones you leave empty keep their default name.
Renaming changes only the parameter name in the request, never its value or when it is sent.
Step 4: Trigger conditions
Send request for decides which event fires the webhook:
Option |
Fires when |
|---|---|
Incoming message |
An SMS or MMS arrives. |
Sent message |
An outgoing message has been sent. |
Delivery report |
A delivery report comes back. |
Sending error |
An outgoing message failed. |
Incoming call |
A call comes in. |
Send request when narrows it down further:
Option |
What it means |
|---|---|
Always |
Every event of the chosen type fires the webhook. |
For specified senders / when text contains |
Only events matching the conditions below fire it. |
If you chose the second option, two conditions become available. You can use one or both, and an event must satisfy every condition you enable.
When incoming SMS comes from Tick this and select the contacts or groups. Only public contacts and groups are accepted.
When incoming SMS text contains Tick this and type the phrase. Tick Case sensitive if upper and lower case should be treated as different. This condition is not available for the Incoming call trigger, since a call has no text.
Step 5: Security settings
Field |
What it does |
|---|---|
API key of your service |
An optional key sent with the request, so your endpoint can verify that the call really comes from your device. |
Expected HTTP Status Code(s) |
Which responses count as success. One or more three-digit codes separated by commas, for example |
Allow self-signed SSL certificate |
Accept a certificate that is not signed by a public authority. |
Verify peer |
Check the server’s certificate. |
Verify peer name |
Check that the certificate matches the host name. |
Anything that does not match the expected status codes counts as a failed request, and is retried according to the global retry interval.
Zabbix rules
If you picked POST (Zabbix) as the method, extra fields appear:
Zabbix action - Acknowledge (ACK), Unacknowledge (NOACK) or both. The panel shows the SMS format the device will expect, for example
ACK 12345 Problem resolved.Auth type - API Token (Zabbix 6.4 and newer, recommended) or Login/Password for older versions. With a token you enter it in the API key field; with login you enter Zabbix username and Zabbix password.
Test values - an Event ID and Message used only by Test connection, never saved.
Click Save webhook.
Step 6: Set the retry interval
The Global options box on the rules page holds Retry interval after failed request, in minutes. When a request fails, the device waits this long before trying again.
Enter a whole number of minutes and click Save. The setting is global: it applies to every webhook rule on the device.
How webhooks behave
Rules apply to events happening after the rule was created and enabled. They do not replay past messages.
The text condition is a contains match, not an exact match.
If several rules match the same event, each of them sends its own request, so one message can reach several endpoints.
A request counts as successful only if the response status is one of the Expected HTTP Status Code(s). Anything else, including no response at all, is a failure and is retried.
Test connection sends a sample payload, not a real message, so it is safe to run against a production endpoint that only logs.
MQTT
What this feature does
MQTT is the messaging protocol used by most IoT devices, sensors and building automation systems.
Devices send short messages to a broker, each tagged with a topic such as
building/boiler/temperature. Anyone connected to the broker can listen to the topics they care
about.
SMSEagle sits on both sides of that conversation:
Rule type |
Direction |
What it does |
|---|---|---|
Subscribe |
MQTT into SMS |
Listens to a broker and turns incoming MQTT messages into SMS messages sent to your people. |
Publish |
SMS into MQTT |
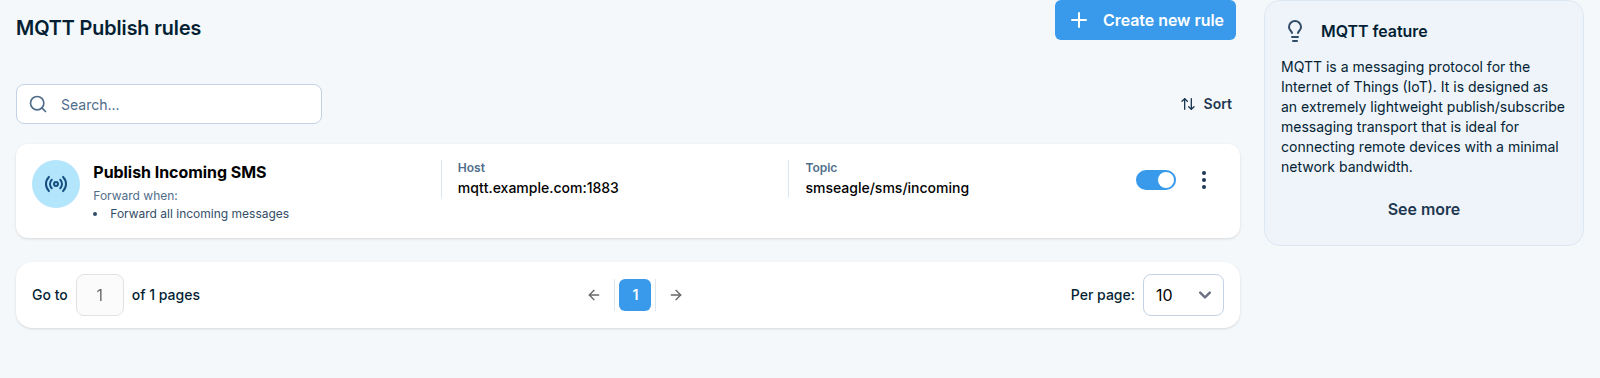
Takes incoming SMS messages and publishes them to a broker, so your IoT system can react to them. |
Typical uses: turning a sensor alarm into an SMS to the maintenance team (Subscribe), or letting a technician text a command that is picked up by the automation system (Publish).
The two rule types are configured separately and do not depend on each other. Use whichever you need.
Before you start
You need the connection details of your MQTT broker: host address, port, and a username and password if the broker requires them - configured once under MQTT in Settings, before writing Subscribe rules here.
For Subscribe rules you also need the list of topics to listen to (also set in Settings). For Publish rules you need the topic to publish into (set per rule, below).
Part 1: Subscribe (MQTT into SMS)
Subscribe rules turn incoming MQTT messages into SMS, once the broker connection itself is configured under Settings.
Step 1: Open the Subscribe rules page
In the sidebar, go to Automation > General > MQTT, then choose Subscribe.
Step 2: Create a Subscribe rule
Click Create new rule in the top right corner. A side panel opens.
Name the rule
In Rule name, type something descriptive, for example Boiler alarm to maintenance. Maximum
100 characters.
Decide which MQTT messages to act on
Choose Forward for:
Option |
What it means |
|---|---|
Any message |
Every MQTT message the device receives triggers this rule. |
Specified topic / message |
Only messages matching the conditions you set below trigger it. |
If you chose Specified topic / message, two conditions become available. You can use one or both. When you use both, a message must satisfy both.
When incoming message has topic
Tick this and type the topic in Topic, for example building/boiler.
When incoming message contains
Tick this and type the phrase in Message phrase, for example ALARM. Tick Case sensitive
if alarm and ALARM should be treated as different.
Choose the recipients
In Forward to, select the contacts or groups that should receive the SMS. Only public contacts and groups can be selected here. This field is required.
Write the SMS text
Message format controls what the SMS says. You build it from the MQTT message using placeholders:
Placeholder |
Replaced with |
|---|---|
|
The topic the MQTT message arrived on |
|
The content of the MQTT message |
The default is {TOPIC}: {MESSAGE}, which produces an SMS like building/boiler/temperature: 94.
You can also write your own sentence around them, for example
Boiler warning on {TOPIC}, value {MESSAGE}.
Tick Send as Unicode if the text contains characters outside the standard GSM alphabet, such as Polish, German or Cyrillic letters.
Advanced options
Click Advanced options to expand this section. You do not need it for a basic setup.
Call after sending SMS - also place a voice call to the same recipients. Options are No, Ring only, Yes - text to speech and Yes - text to speech (advanced), depending on what your device model supports. With the advanced option you also pick a Voice model.
Click Save. The rule starts working on MQTT messages received from now on.
How Subscribe matching works
The Topic condition is a contains match and ignores upper and lower case. A rule with topic
boileralso matchesbuilding/boiler/temperature.The Case sensitive checkbox applies to the message phrase only, never to the topic.
If several Subscribe rules match the same MQTT message, each of them sends its own SMS.
Part 2: Publish (SMS into MQTT)
Publish rules do not use the MQTT service settings under Settings. Each rule carries its own broker connection, so different rules can publish to different brokers.
Step 1: Open the Publish rules page
In the sidebar, go to Automation > General > MQTT, then choose Publish.
Step 2: Create a Publish rule
Click Create new rule in the top right corner. A side panel opens.
Name the rule
In Rule name, type something descriptive, for example Technician commands to automation.
Maximum 100 characters.
Decide which SMS messages to publish
Choose Forward for:
Option |
What it means |
|---|---|
Any message |
Every incoming SMS is published to the broker. |
Specified sender / message |
Only messages matching the conditions you set below are published. |
If you chose Specified sender / message, the conditions below become available. You can combine them, and a message then has to satisfy all of the ones you enable.
When incoming SMS comes from Tick this and select the sender contacts or groups. Only public contacts and groups can be selected here.
When incoming SMS text contains Tick this and type the phrase in Text fragment. Tick Case sensitive if upper and lower case should be treated as different.
Restricting a Publish rule by sender is a sensible precaution. Without a sender condition, anybody who knows your number can push content into your IoT system.
Enter the broker connection
Fill in the broker this rule publishes to:
Field |
What to enter |
|---|---|
Host |
The broker address, for example |
Port |
The broker port, for example |
Username |
The broker user, if required. Leave empty for an open broker. |
Password |
The broker password, if required. |
Topic |
The topic to publish into, for example |
TLS/SSL |
Turn on if the broker uses an encrypted connection. |
TLS certificate verification |
Leave on unless the broker uses a self-signed certificate the device cannot validate. |
Click Save. Incoming SMS messages that match the rule are published from now on.
How Publish matching works
The text condition is a contains match, not an exact match.
If several Publish rules match the same SMS, each of them publishes, so the message can land on more than one broker or topic.
Rules apply only to messages arriving after the rule was created and enabled. They do not process messages already in the inbox.
Inbox Rules
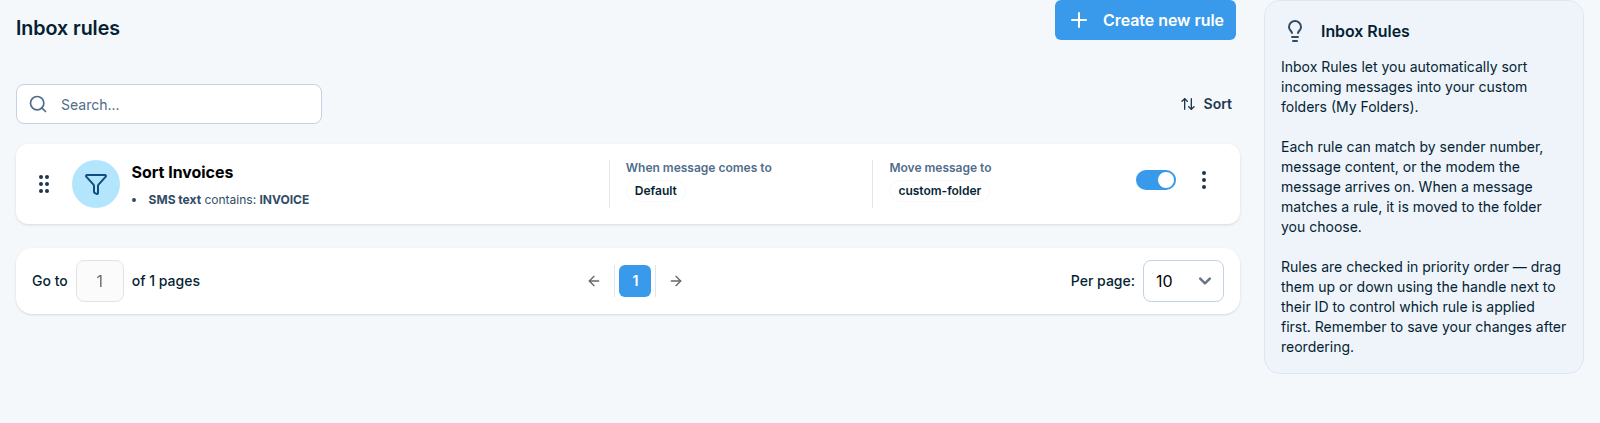
Inbox Rules automatically sort incoming messages into your custom folders (My Folders), instead of leaving everything in the main Inbox.
Where to find it
Automation > Folders > Inbox Rules (/automation/inbox-rules/).
Configuring an inbox rule
Click Create new rule. Each rule can match by sender number, message content, or the modem the message arrived on; a message matching the rule is moved to the folder you choose.
Rules are checked in priority order. Drag a rule up or down using the handle next to its ID to control which rule is applied first, and remember to save your changes after reordering.
Cleanup Folders
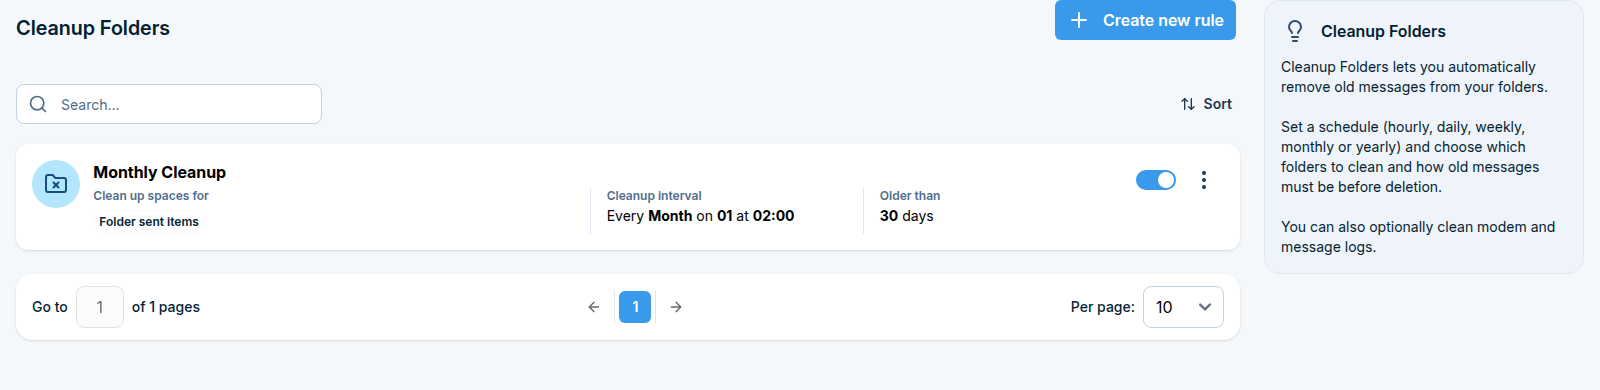
Cleanup Folders automatically removes old messages from your folders, so they do not accumulate indefinitely.
Where to find it
Automation > Folders > Cleanup Folders (/automation/cleanup-folders/).
Configuring a cleanup rule
Click Create new rule, then set a schedule (hourly, daily, weekly, monthly, or yearly), choose which folders to clean, and how old a message must be before it is deleted. You can also optionally clean modem and message logs on the same schedule.