

Phonebook
The Phonebook is where you keep the contacts and groups you send messages to or receive messages from.
Contacts
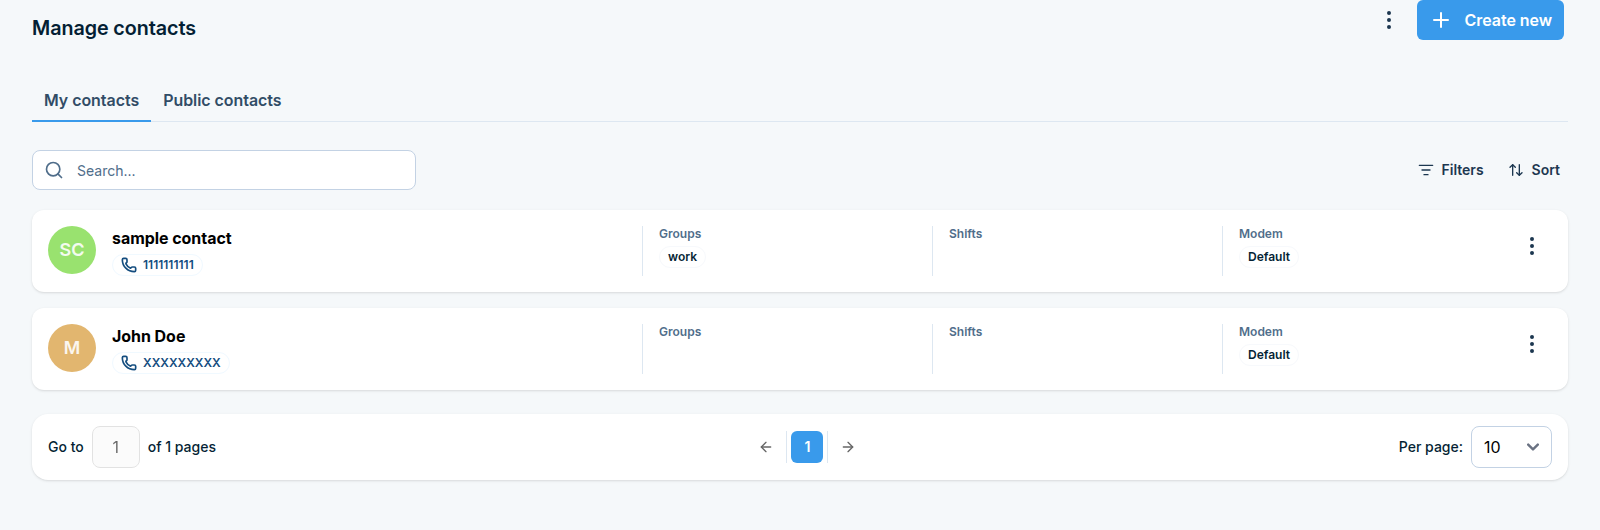
Phonebook > Contacts (/phonebook/contacts). Click Create new to add a contact. The
contacts list is split into two tabs:
My contacts - contacts only you can see and use.
Public contacts - contacts shared with other users of the device (needed, for example, so a public contact can be addressed by name from Email to SMS).
Each contact can belong to one or more Groups, be assigned a Shift (see Shifts below), and be pinned to a specific Modem for outgoing messages. Use Filters and Sort to find a contact in a large phonebook.
Groups
Phonebook > Groups (/phonebook/groups). Groups let you address a whole set of contacts at
once (for example from Compose SMS, or as the target of an automation rule) instead of picking
each contact individually. Click Add new, give the group a Name, and tick Set as Public
Group if other users, automation rules, or the API should be able to send to it.
Escalation groups
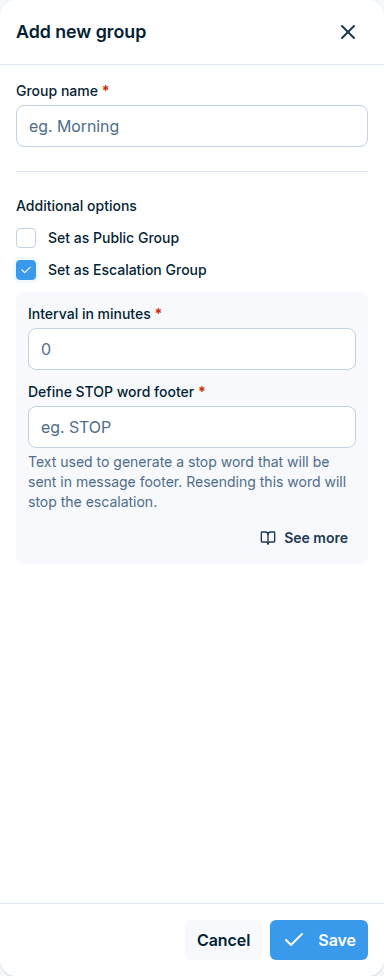
An escalation group alerts people one after another, not all at once, until somebody confirms they are handling the problem - put your on-call people into a group in a chosen order, set an interval, and when you send a message to the group the first person gets it immediately, the second gets it if nobody stops the escalation, and so on down the list. Watching and controlling a running escalation happens in Escalation queue under Messages; this section is where you set one up.
Step 1: Create the escalation group
Click Add new. A side panel opens.
Fill in Name, for example
Night on-call.Tick Escalation group. Two extra fields appear.
Fill in Escalation interval (minutes): how long to wait before alerting the next person. Allowed values are 1 to 999.
Fill in Escalation stop word: the word recipients text back to stop the escalation.
Maximum 8 characters.
Letters only, no digits, spaces, or punctuation.
It must be unique - each escalation group needs its own stop word.
Click Save.
Tick Set as Public Group as well if other users of the device, automation rules, or the API should be able to send to this group.
Step 2: Add people and set their order
On the Groups page, find your escalation group and open Manage contacts.
Add the contacts who should be alerted.
Put them in the right order by dragging the cards up and down. The person at the top is contacted first - this is exactly the order in which alerts are sent.
Step 3: Trigger an escalation
Send a message to the group the same way you send any other message, from Compose. SMSEagle
then appends a line telling the recipient what to text back to stop the escalation (in the form
To stop the escalation, send: <stop word><number>), sends the message to the first contact right
away, and schedules the same message for the next contacts, spaced out by the interval you set.
Tell your recipients exactly what to reply. The number after the stop word identifies this particular escalation, so the reply must contain the whole thing, for example
ACK17, matching exactly - the stop word and the number joined with no space, the same upper and lower case, and nothing else in the message. Only somebody who is a member of the escalation group can stop it; a reply from an unrelated number is ignored.
You can also trigger an escalation group from the API, from Email to SMS, or from any automation rule that sends to a group.
Shifts
Shifts describe when a person is on duty. Once you assign a shift to a contact, SMSEagle checks the shift before sending them a message: if a message is addressed to a contact who is currently outside their shift hours, SMSEagle either holds the message and delivers it at the start of their next shift, or does not send it at all - you choose which (see Step 4 below).
Typical use: an on-call rota, where the night shift should not be woken up by alerts meant for the day shift.
Good to know: a contact with no shift assigned is always considered available. Shifts only restrict the contacts you assign them to.
Before you start
You need at least one contact in the Phonebook (Phonebook > Contacts).
Make sure the device clock and time zone are correct, because shift hours are compared against the device time. Check this in Settings > Date/Time.
Step 1: Open the Shifts page
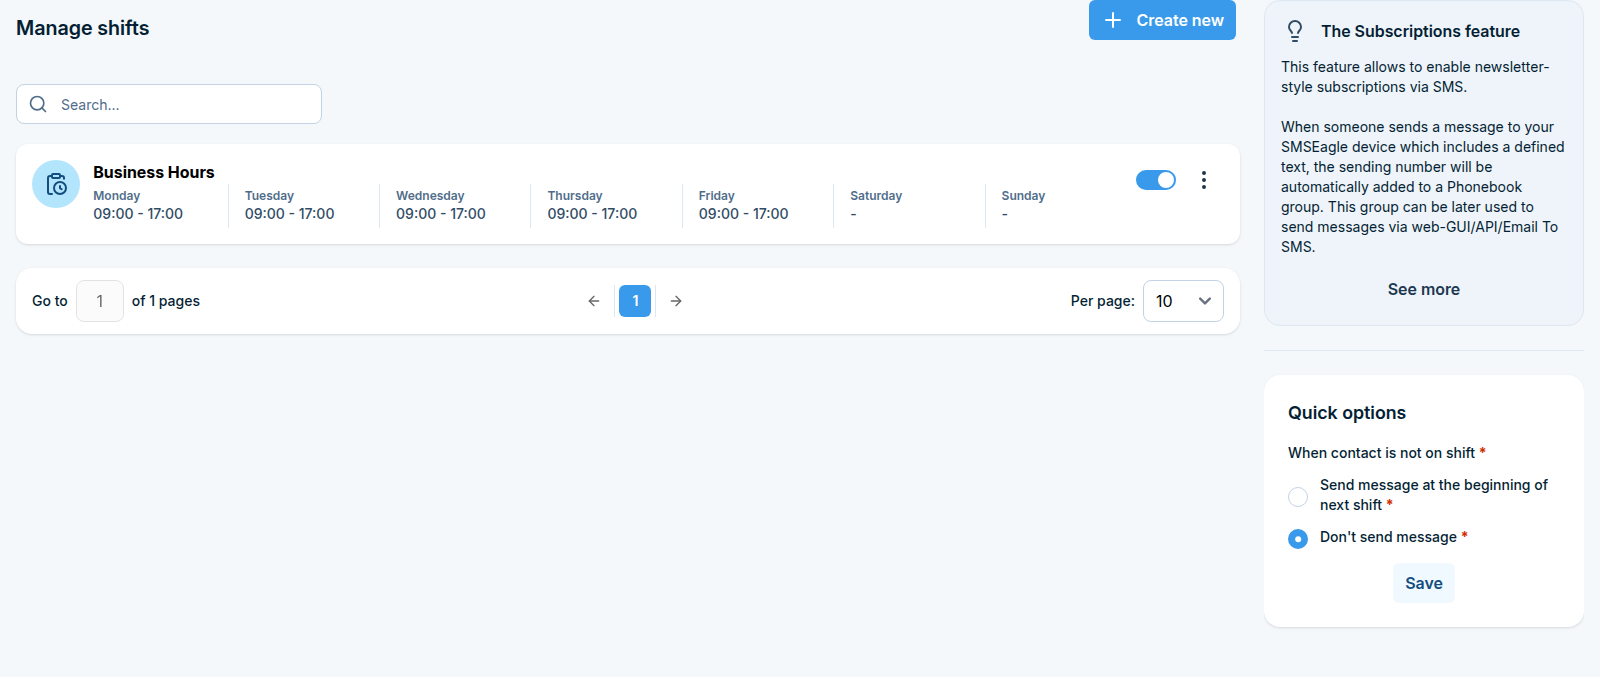
Phonebook > Shifts (/phonebook/shifts) lists the shifts you have already created, with a
Quick options box on the right.
Step 2: Create a shift
Click Create new in the top right corner. A side panel opens.
Fill in Name, for example
Night shiftorWeekend duty.Leave Enabled ticked so the shift starts working right away. Untick it to prepare the shift now and activate it later.
Under Active from - to, set the hours for each day of the week: enter a From and a To time for every day the person is on duty, and leave a day empty if they are not.
Click Save.
Rules for shift hours
From must be earlier than To on the same day.
Both From and To must be filled in, or both left empty. A half-filled day is rejected with an error message.
At least one day must have hours set.
Overnight shifts: a shift that crosses midnight (for example 22:00 to 06:00) has to be entered as two entries:
22:00 - 23:59on the first day and00:00 - 06:00on the next day.
Step 3: Assign contacts to the shift
You can do this from either side.
From the shift: on the Shifts page, find your shift, open its actions, and choose Manage contacts.
From the contact: go to Phonebook > Contacts, select one or more contacts using their checkboxes, choose Edit shifts, pick the shifts to assign, and click Assign shifts.
Step 4: Choose what happens outside shift hours
The Quick options box on the right of the Shifts page holds When contact is not on shift:
Option |
Result |
|---|---|
Send message at the beginning of next shift |
The message waits in the queue and is delivered automatically when the contact’s next shift starts. |
Don’t send message |
The message is not sent to that contact. It is recorded as not delivered. |
Pick the option you want and click Save.
This setting is global. It applies to every shift and every contact on the device, not just the shift you are currently looking at.